Passing Props to a Component
React components use props to communicate with each other. Every parent component can pass some information to its child components by giving them props. Props might remind you of HTML attributes, but you can pass any JavaScript value through them, including objects, arrays, and functions.
You will learn
- How to pass props to a component
- How to read props from a component
- How to specify default values for props
- How to pass some JSX to a component
- How props change over time
Familiar props
Props are the information that you pass to a JSX tag. For example, className, src, alt, width, and height are some of the props you can pass to an <img>:
function Avatar() {
  return (
    <img
      className="avatar"
      src="https://react.dev/images/docs/scientists/1bX5QH6.jpg"
      alt="Lin Lanying"
      width={100}
      height={100}
    />
  );
}

export default function Profile() {
  return (
    <Avatar />
  );
}
The props you can pass to an <img> tag are predefined (ReactDOM conforms to the HTML standard). But you can pass any props to your own components, such as <Avatar>, to customize them. Here’s how!
Passing props to a component
In this code, the Profile component isn’t passing any props to its child component, Avatar:
export default function Profile() {
  return (
    <Avatar />
  );
}
You can give Avatar some props in two steps.
Step 1: Pass props to the child component
First, pass some props to Avatar. For example, let’s pass two props: person (an object), and size (a number):
export default function Profile() {
  return (
    <Avatar
      person={{ name: 'Lin Lanying', imageId: '1bX5QH6' }}
      size={100}
    />
  );
}Now you can read these props inside the Avatar component.
Step 2: Read props inside the child component
You can read these props by listing their names person, size separated by the commas inside ({ and }) directly after function Avatar. This lets you use them inside the Avatar code, like you would with a variable.
function Avatar({ person, size }) {
  // person and size are available here
}
Add some logic to Avatar that uses the person and size props for rendering, and you’re done.
Now you can configure Avatar to render in many different ways with different props. Try tweaking the values!
import { getImageUrl } from './utils.js';

function Avatar({ person, size }) {
  return (
    <img
      className="avatar"
      src={getImageUrl(person)}
      alt={person.name}
      width={size}
      height={size}
    />
  );
}

export default function Profile() {
  return (
    <div>
      <Avatar
        size={100}
        person={{
          name: 'Katsuko Saruhashi',
          imageId: 'YfeOqp2'
        }}
      />
      <Avatar
        size={80}
        person={{
          name: 'Aklilu Lemma',
          imageId: 'OKS67lh'
        }}
      />
      <Avatar
        size={50}
        person={{
          name: 'Lin Lanying',
          imageId: '1bX5QH6'
        }}
      />
    </div>
  );
}
Props let you think about parent and child components independently. For example, you can change the person or the size props inside Profile without having to think about how Avatar uses them. Similarly, you can change how the Avatar uses these props, without looking at the Profile.
You can think of props like “knobs” that you can adjust. They serve the same role as arguments serve for functions—in fact, props are the only argument to your component! React component functions accept a single argument, a props object:
function Avatar(props) {
  let person = props.person;
  let size = props.size;
  // ...
}
Usually you don’t need the whole props object itself, so you destructure it into individual props.
Specifying a default value for a prop
If you want to give a prop a default value to fall back on when no value is specified, you can do it with the destructuring by putting = and the default value right after the parameter:
function Avatar({ person, size = 100 }) {
  // ...
}
Now, if <Avatar person={...} /> is rendered with no size prop, the size will be set to 100.
The default value is only used if the size prop is missing or if you pass size={undefined}. But if you pass size={null} or size={0}, the default value will not be used.
Forwarding props with the JSX spread syntax
Sometimes, passing props gets very repetitive:
function Profile({ person, size, isSepia, thickBorder }) {
  return (
    <div className="card">
      <Avatar
        person={person}
        size={size}
        isSepia={isSepia}
        thickBorder={thickBorder}
      />
    </div>
  );
}
There’s nothing wrong with repetitive code—it can be more legible. But at times you may value conciseness. Some components forward all of their props to their children, like how this Profile does with Avatar. Because they don’t use any of their props directly, it can make sense to use a more concise “spread” syntax:
function Profile(props) {
  return (
    <div className="card">
      <Avatar {...props} />
    </div>
  );
}
This forwards all of Profile’s props to the Avatar without listing each of their names.
Use spread syntax with restraint. If you’re using it in every other component, something is wrong. Often, it indicates that you should split your components and pass children as JSX. More on that next!
Passing JSX as children
It is common to nest built-in browser tags:
<div>
  <img />
</div>
Sometimes you’ll want to nest your own components the same way:
<Card>
  <Avatar />
</Card>
When you nest content inside a JSX tag, the parent component will receive that content in a prop called children. For example, the Card component below will receive a children prop set to <Avatar /> and render it in a wrapper div:
import Avatar from './Avatar.js';

function Card({ children }) {
  return (
    <div className="card">
      {children}
    </div>
  );
}

export default function Profile() {
  return (
    <Card>
      <Avatar
        size={100}
        person={{
          name: 'Katsuko Saruhashi',
          imageId: 'YfeOqp2'
        }}
      />
    </Card>
  );
}
Try replacing the <Avatar> inside <Card> with some text to see how the Card component can wrap any nested content. It doesn’t need to “know” what’s being rendered inside of it. You will see this flexible pattern in many places.
You can think of a component with a children prop as having a “hole” that can be “filled in” by its parent components with arbitrary JSX. You will often use the children prop for visual wrappers: panels, grids, etc.
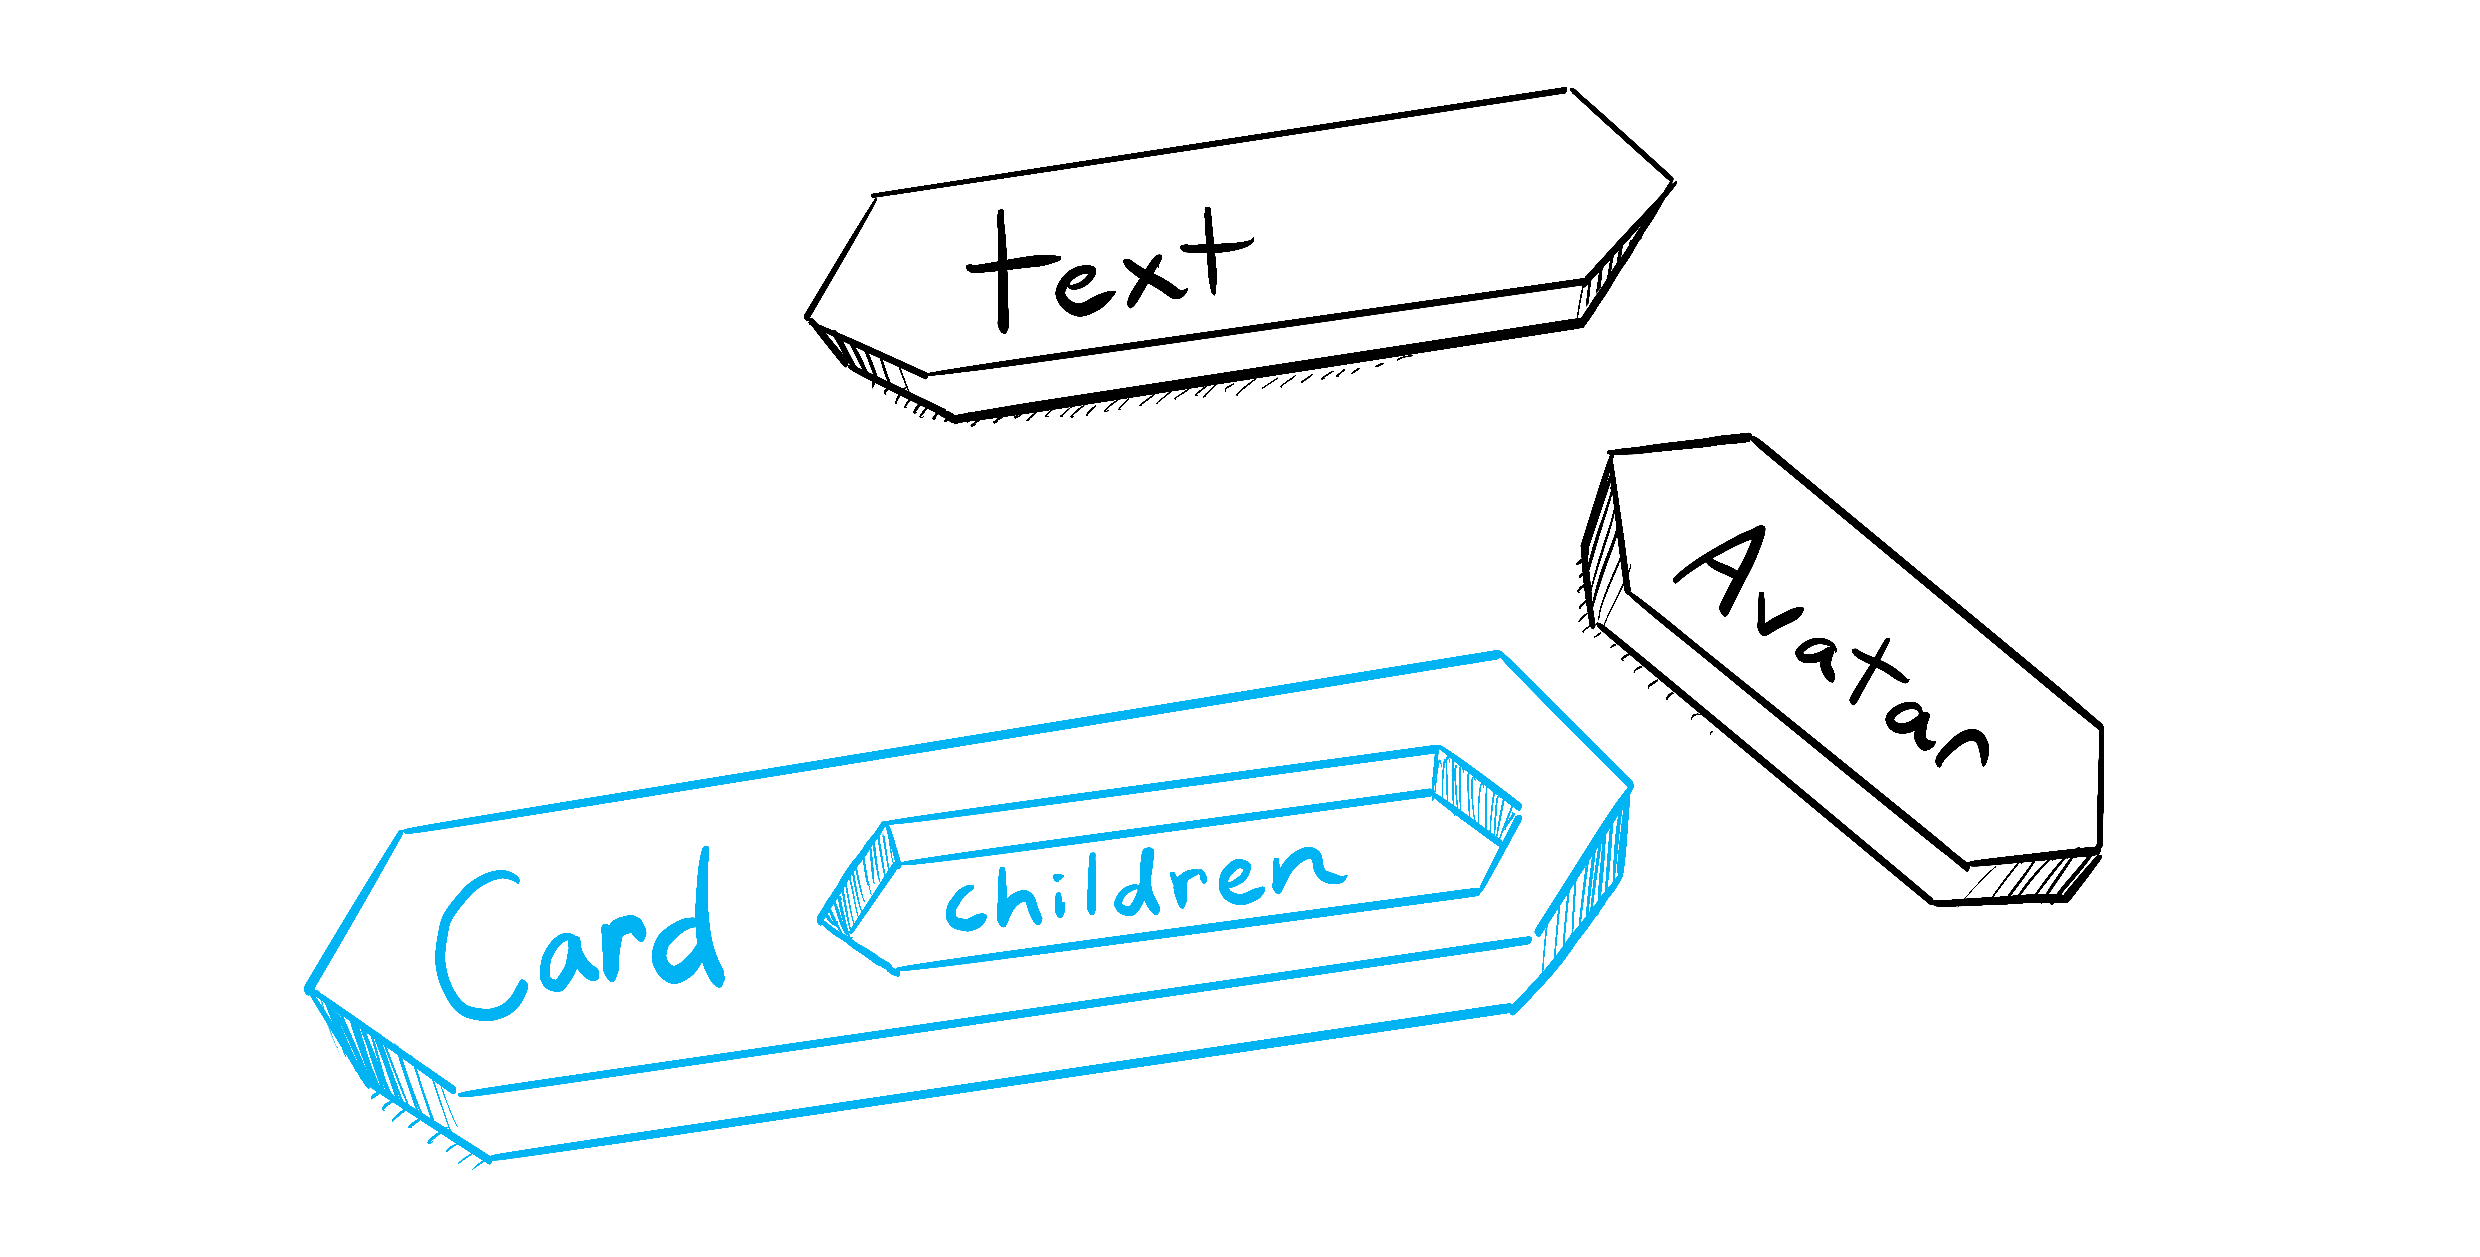
Illustrated by Rachel Lee Nabors
How props change over time
The Clock component below receives two props from its parent component: color and time. (The parent component’s code is omitted because it uses state, which we won’t dive into just yet.)
Try changing the color in the select box below:
export default function Clock({ color, time }) {
  return (
    <h1 style={{ color: color }}>
      {time}
    </h1>
  );
}
This example illustrates that a component may receive different props over time. Props are not always static! Here, the time prop changes every second, and the color prop changes when you select another color. Props reflect a component’s data at any point in time, rather than only in the beginning.
However, props are immutable—a term from computer science meaning “unchangeable”. When a component needs to change its props (for example, in response to a user interaction or new data), it will have to “ask” its parent component to pass it different props—a new object! Its old props will then be cast aside, and eventually the JavaScript engine will reclaim the memory taken by them.
Don’t try to “change props”. When you need to respond to the user input (like changing the selected color), you will need to “set state”, which you can learn about in State: A Component’s Memory.
Recap
- To pass props, add them to the JSX, just like you would with HTML attributes.
- To read props, use the
function Avatar({ person, size })destructuring syntax. - You can specify a default value like
size = 100, which is used for missing andundefinedprops. - You can forward all props with
<Avatar {...props} />JSX spread syntax, but don’t overuse it! - Nested JSX like
<Card><Avatar /></Card>will appear asCardcomponent’schildrenprop. - Props are read-only snapshots in time: every render receives a new version of props.
- You can’t change props. When you need interactivity, you’ll need to set state.
Challenge 1 of 3: Extract a component
This Gallery component contains some very similar markup for two profiles. Extract a Profile component out of it to reduce the duplication. You’ll need to choose what props to pass to it.
import { getImageUrl } from './utils.js';

export default function Gallery() {
  return (
    <div>
      <h1>Notable Scientists</h1>
      <section className="profile">
        <h2>Maria Skłodowska-Curie</h2>
        <img
          className="avatar"
          src={getImageUrl('szV5sdG')}
          alt="Maria Skłodowska-Curie"
          width={70}
          height={70}
        />
        <ul>
          <li>
            <b>Profession: </b>
            physicist and chemist
          </li>
          <li>
            <b>Awards: 4 </b>
            (Nobel Prize in Physics, Nobel Prize in Chemistry, Davy Medal, Matteucci Medal)
          </li>
          <li>
            <b>Discovered: </b>
            polonium (chemical element)
          </li>
        </ul>
      </section>
      <section className="profile">
        <h2>Katsuko Saruhashi</h2>
        <img
          className="avatar"
          src={getImageUrl('YfeOqp2')}
          alt="Katsuko Saruhashi"
          width={70}
          height={70}
        />
        <ul>
          <li>
            <b>Profession: </b>
            geochemist
          </li>
          <li>
            <b>Awards: 2 </b>
            (Miyake Prize for geochemistry, Tanaka Prize)
          </li>
          <li>
            <b>Discovered: </b>
            a method for measuring carbon dioxide in seawater
          </li>
        </ul>
      </section>
    </div>
  );
}