Reacting to Input with State
React provides a declarative way to manipulate the UI. Instead of manipulating individual pieces of the UI directly, you describe the different states that your component can be in, and switch between them in response to the user input. This is similar to how designers think about the UI.
You will learn
- How declarative UI programming differs from imperative UI programming
- How to enumerate the different visual states your component can be in
- How to trigger the changes between the different visual states from code
How declarative UI compares to imperative
When you design UI interactions, you probably think about how the UI changes in response to user actions. Consider a form that lets the user submit an answer:
- When you type something into the form, the “Submit” button becomes enabled.
- When you press “Submit”, both the form and the button become disabled, and a spinner appears.
- If the network request succeeds, the form gets hidden, and the “Thank you” message appears.
- If the network request fails, an error message appears, and the form becomes enabled again.
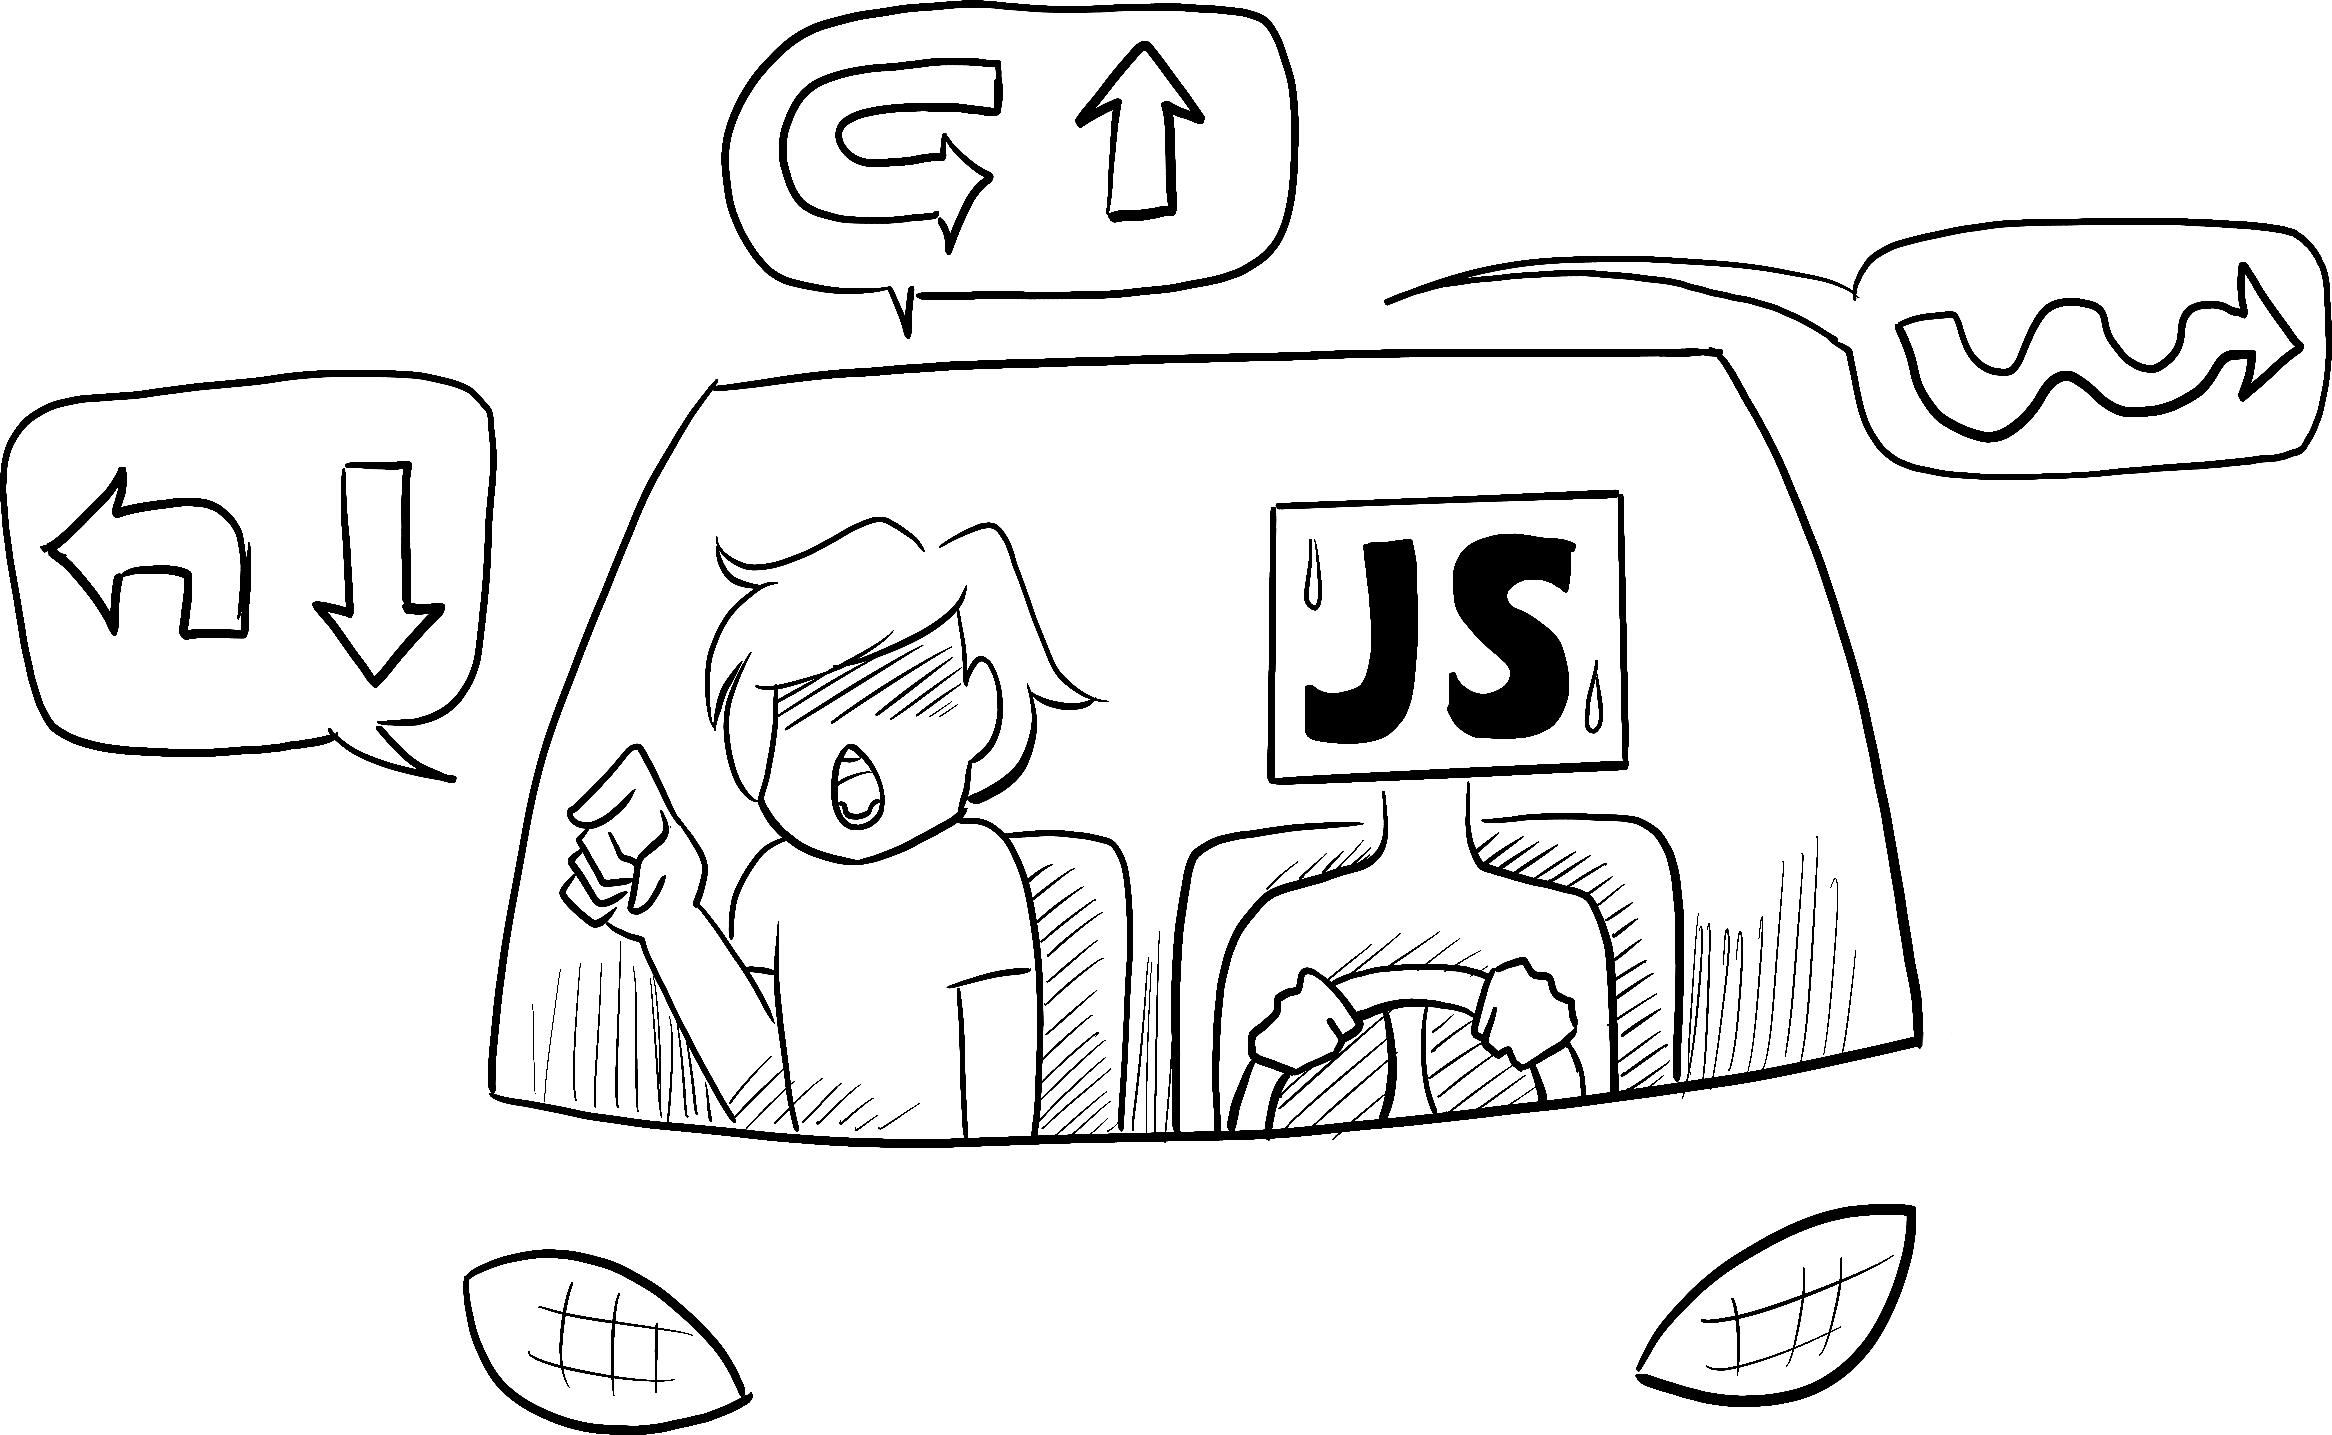
In imperative programming, the above corresponds directly to how you implement interaction. You have to write the exact instructions to manipulate the UI depending on what just happened. Here’s another way to think about this: imagine riding next to someone in a car and telling them turn by turn where to go.
Illustrated by Rachel Lee Nabors
They don’t know where you want to go, they just follow your commands. (And if you get the directions wrong, you end up in the wrong place!) It’s called imperative because you have to “command” each element, from the spinner to the button, telling the computer how to update the UI.
In this example of imperative UI programming, the form is built without React. It only uses the browser DOM:
async function handleFormSubmit(e) {
  e.preventDefault();
  disable(textarea);
  disable(button);
  show(loadingMessage);
  hide(errorMessage);
  try {
    await submitForm(textarea.value);
    show(successMessage);
    hide(form);
  } catch (err) {
    show(errorMessage);
    errorMessage.textContent = err.message;
  } finally {
    hide(loadingMessage);
    enable(textarea);
    enable(button);
  }
}

function handleTextareaChange() {
  if (textarea.value.length === 0) {
    disable(button);
  } else {
    enable(button);
  }
}

function hide(el) {
  el.style.display = 'none';
}

function show(el) {
  el.style.display = '';
}

function enable(el) {
  el.disabled = false;
}

function disable(el) {
  el.disabled = true;
}

function submitForm(answer) {
  // Pretend it's hitting the network.
  return new Promise((resolve, reject) => {
    setTimeout(() => {
      if (answer.toLowerCase() === 'istanbul') {
        resolve();
      } else {
        reject(new Error('Good guess but a wrong answer. Try again!'));
      }
    }, 1500);
  });
}

let form = document.getElementById('form');
let textarea = document.getElementById('textarea');
let button = document.getElementById('button');
let loadingMessage = document.getElementById('loading');
let errorMessage = document.getElementById('error');
let successMessage = document.getElementById('success');
form.onsubmit = handleFormSubmit;
textarea.oninput = handleTextareaChange;
Manipulating the UI imperatively works well enough for isolated examples, but it gets exponentially more difficult to manage in more complex systems. Imagine updating a page full of different forms like this one. Adding a new UI element or a new interaction would require carefully checking all existing code to make sure you haven’t introduced a bug (for example, forgetting to show or hide something).
React was built to solve this problem.
In React, you don’t directly manipulate the UI—meaning you don’t enable, disable, show, or hide components directly. Instead, you declare what you want to show, and React figures out how to update the UI. Think of getting into a taxi and telling the driver where you want to go instead of telling them exactly where to turn. It’s the driver’s job to get you there, and they might even know some shortcuts you haven’t considered!
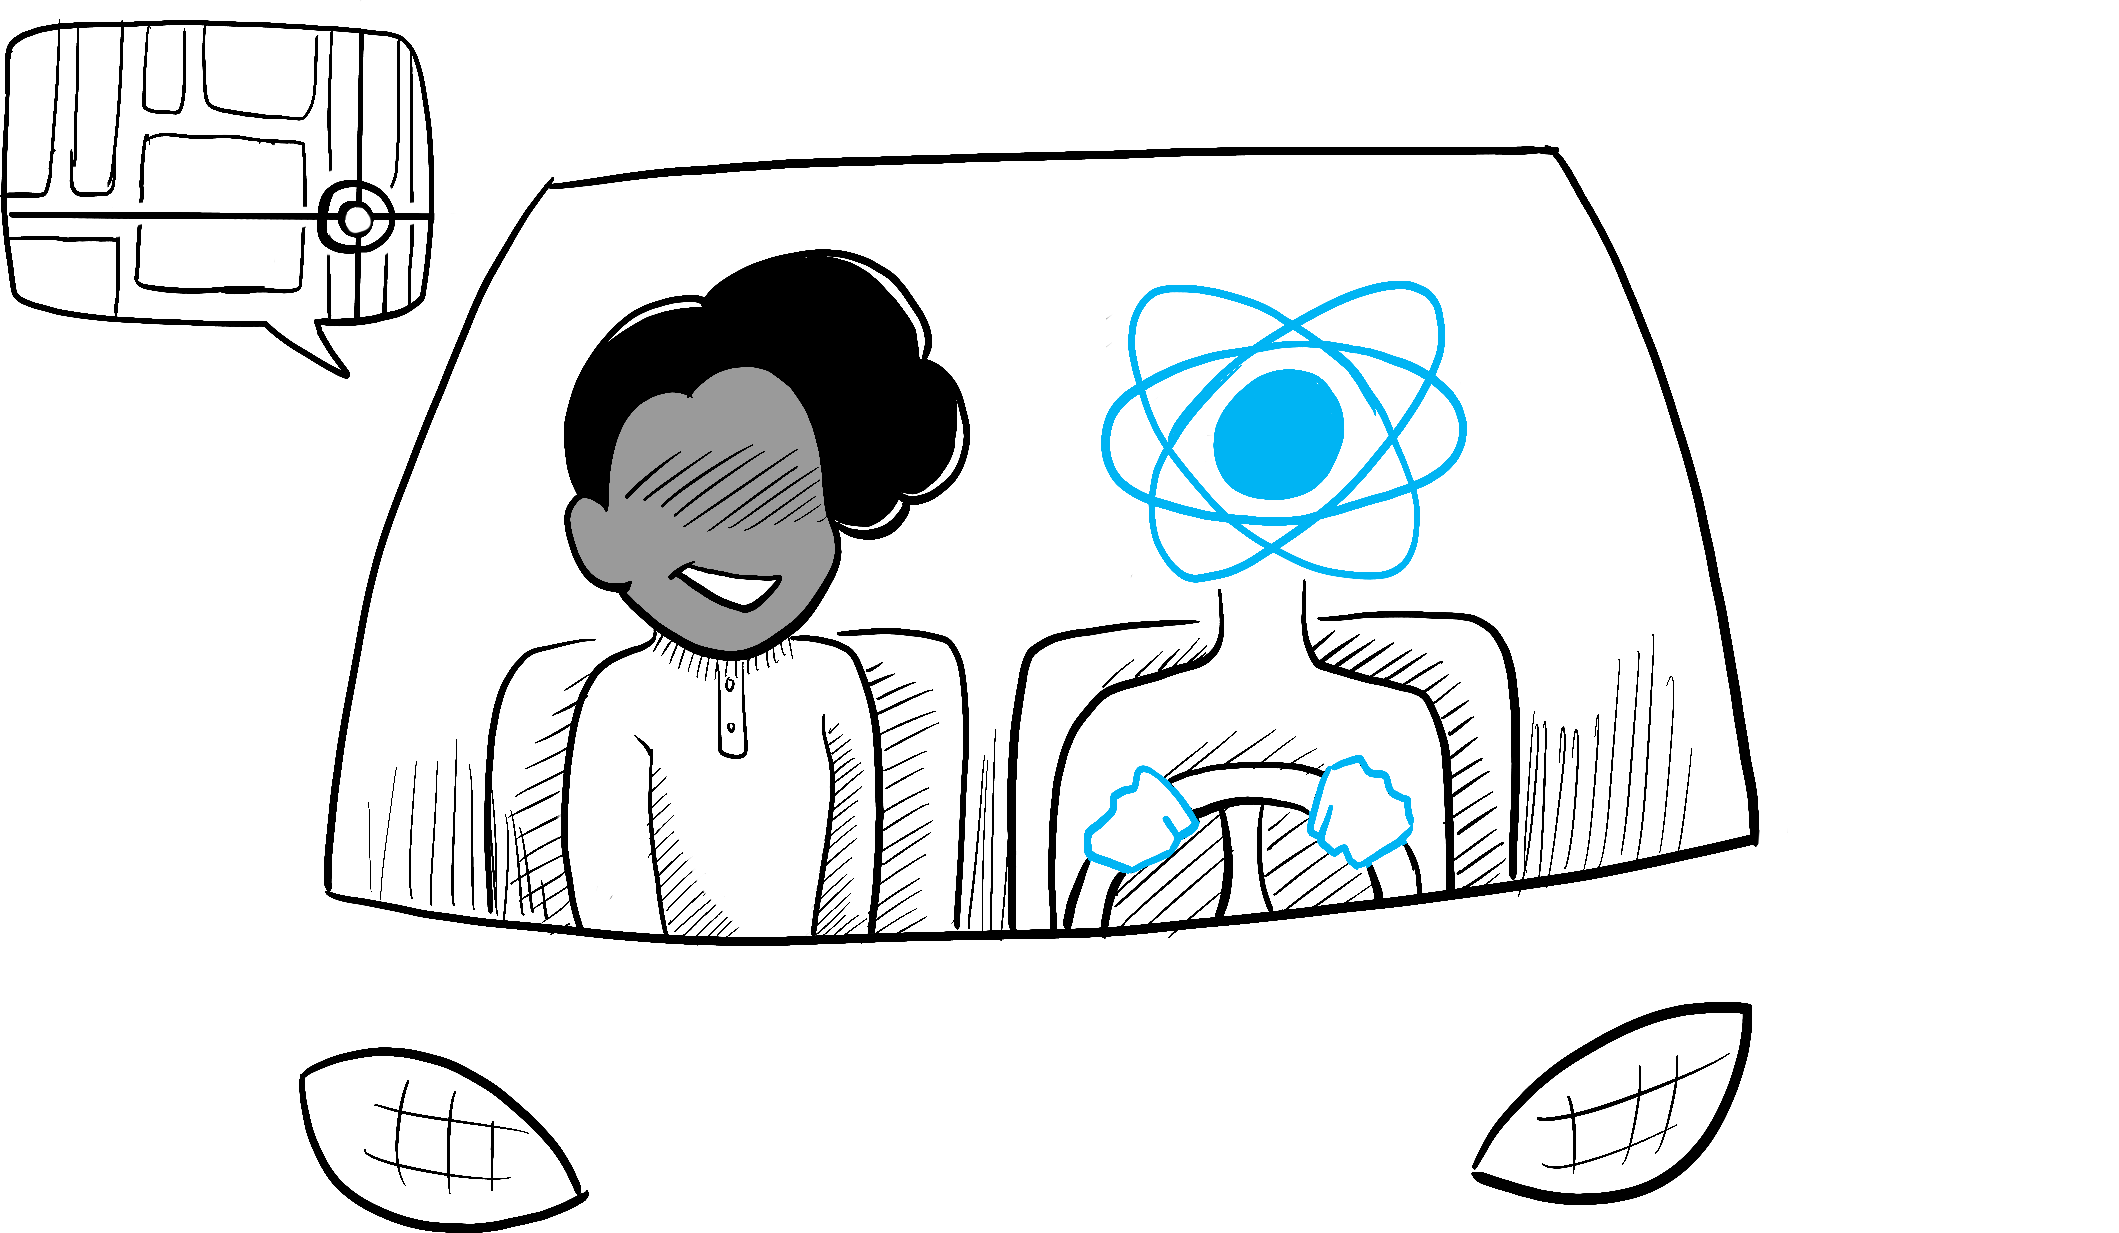
Illustrated by Rachel Lee Nabors
Thinking about UI declaratively
You’ve seen how to implement a form imperatively above. To better understand how to think in React, you’ll walk through reimplementing this UI in React below:
- Identify your component’s different visual states
- Determine what triggers those state changes
- Represent the state in memory using
useState - Remove any non-essential state variables
- Connect the event handlers to set the state
Step 1: Identify your component’s different visual states
In computer science, you may hear about a “state machine” being in one of several “states”. If you work with a designer, you may have seen mockups for different “visual states”. React stands at the intersection of design and computer science, so both of these ideas are sources of inspiration.
First, you need to visualize all the different “states” of the UI the user might see:
- Empty: Form has a disabled “Submit” button.
- Typing: Form has an enabled “Submit” button.
- Submitting: Form is completely disabled. Spinner is shown.
- Success: “Thank you” message is shown instead of a form.
- Error: Same as Typing state, but with an extra error message.
Just like a designer, you’ll want to “mock up” or create “mocks” for the different states before you add logic. For example, here is a mock for just the visual part of the form. This mock is controlled by a prop called status with a default value of 'empty':
export default function Form({
  status = 'empty'
}) {
  if (status === 'success') {
    return <h1>That's right!</h1>
  }
  return (
    <>
      <h2>City quiz</h2>
      <p>
        In which city is there a billboard that turns air into drinkable water?
      </p>
      <form>
        <textarea />
        <br />
        <button>
          Submit
        </button>
      </form>
    </>
  )
}
You could call that prop anything you like, the naming is not important. Try editing status = 'empty' to status = 'success' to see the success message appear. Mocking lets you quickly iterate on the UI before you wire up any logic. Here is a more fleshed out prototype of the same component, still “controlled” by the status prop:
export default function Form({
  // Try 'submitting', 'error', 'success':
  status = 'empty'
}) {
  if (status === 'success') {
    return <h1>That's right!</h1>
  }
  return (
    <>
      <h2>City quiz</h2>
      <p>
        In which city is there a billboard that turns air into drinkable water?
      </p>
      <form>
        <textarea disabled={
          status === 'submitting'
        } />
        <br />
        <button disabled={
          status === 'empty' ||
          status === 'submitting'
        }>
          Submit
        </button>
        {status === 'error' &&
          <p className="Error">
            Good guess but a wrong answer. Try again!
          </p>
        }
      </form>
      </>
  );
}
Deep Dive
If a component has a lot of visual states, it can be convenient to show them all on one page:
import Form from './Form.js';

let statuses = [
  'empty',
  'typing',
  'submitting',
  'success',
  'error',
];

export default function App() {
  return (
    <>
      {statuses.map(status => (
        <section key={status}>
          <h4>Form ({status}):</h4>
          <Form status={status} />
        </section>
      ))}
    </>
  );
}
Pages like this are often called “living styleguides” or “storybooks”.
Step 2: Determine what triggers those state changes
You can trigger state updates in response to two kinds of inputs:
- Human inputs, like clicking a button, typing in a field, navigating a link.
- Computer inputs, like a network response arriving, a timeout completing, an image loading.

Illustrated by Rachel Lee Nabors
In both cases, you must set state variables to update the UI. For the form you’re developing, you will need to change state in response to a few different inputs:
- Changing the text input (human) should switch it from the Empty state to the Typing state or back, depending on whether the text box is empty or not.
- Clicking the Submit button (human) should switch it to the Submitting state.
- Successful network response (computer) should switch it to the Success state.
- Failed network response (computer) should switch it to the Error state with the matching error message.
To help visualize this flow, try drawing each state on paper as a labeled circle, and each change between two states as an arrow. You can sketch out many flows this way and sort out bugs long before implementation.
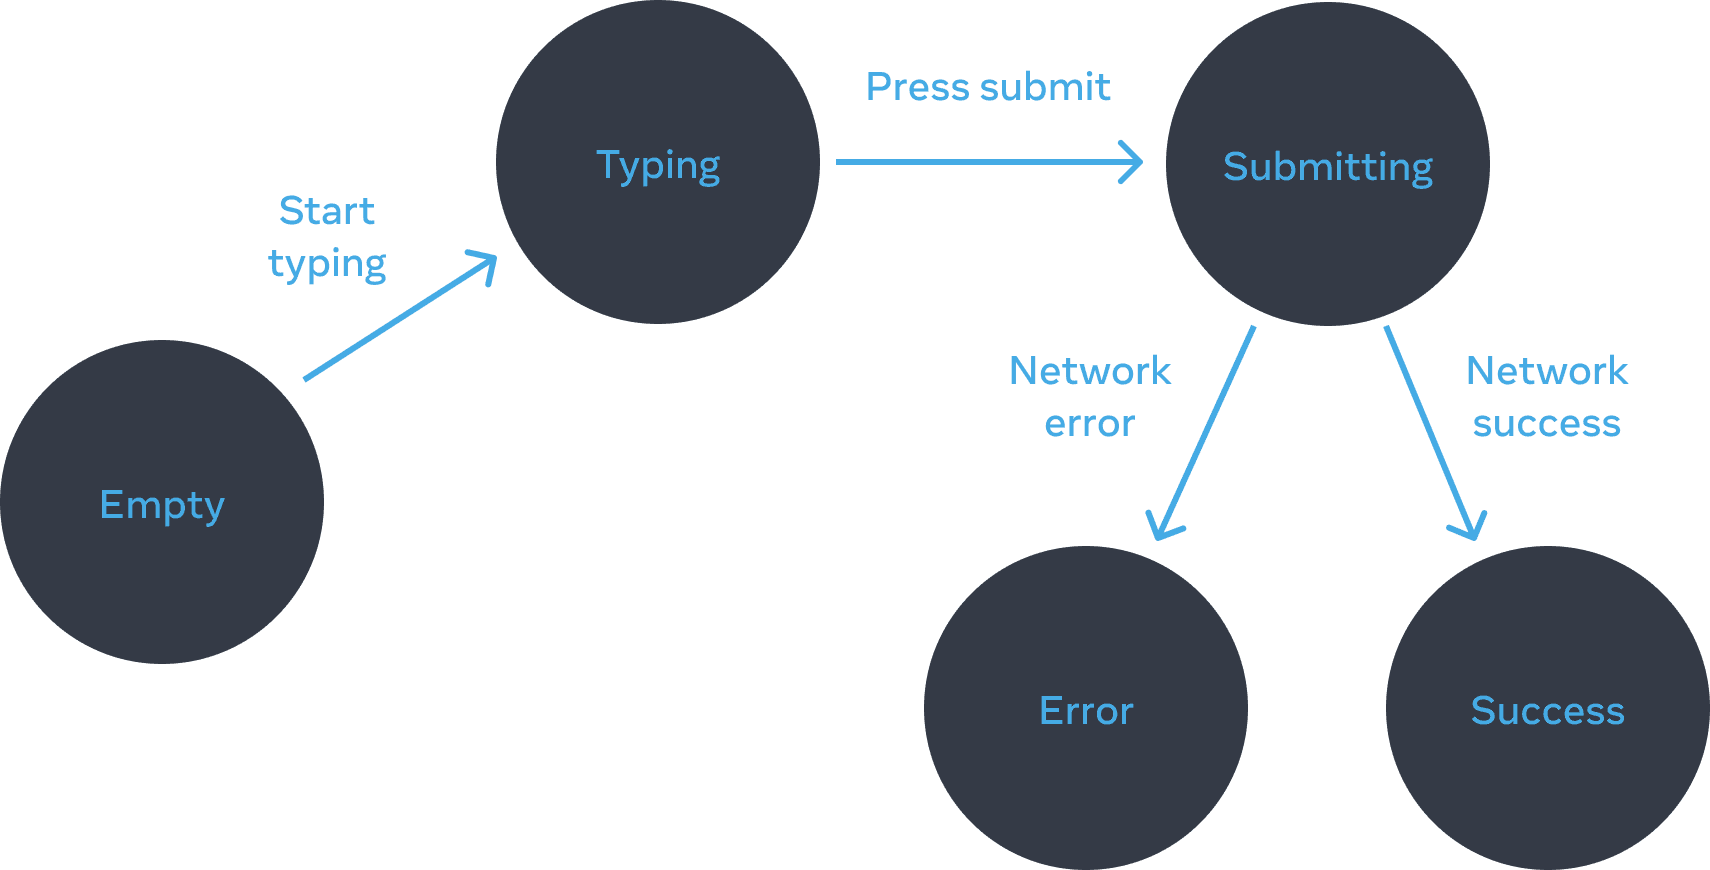
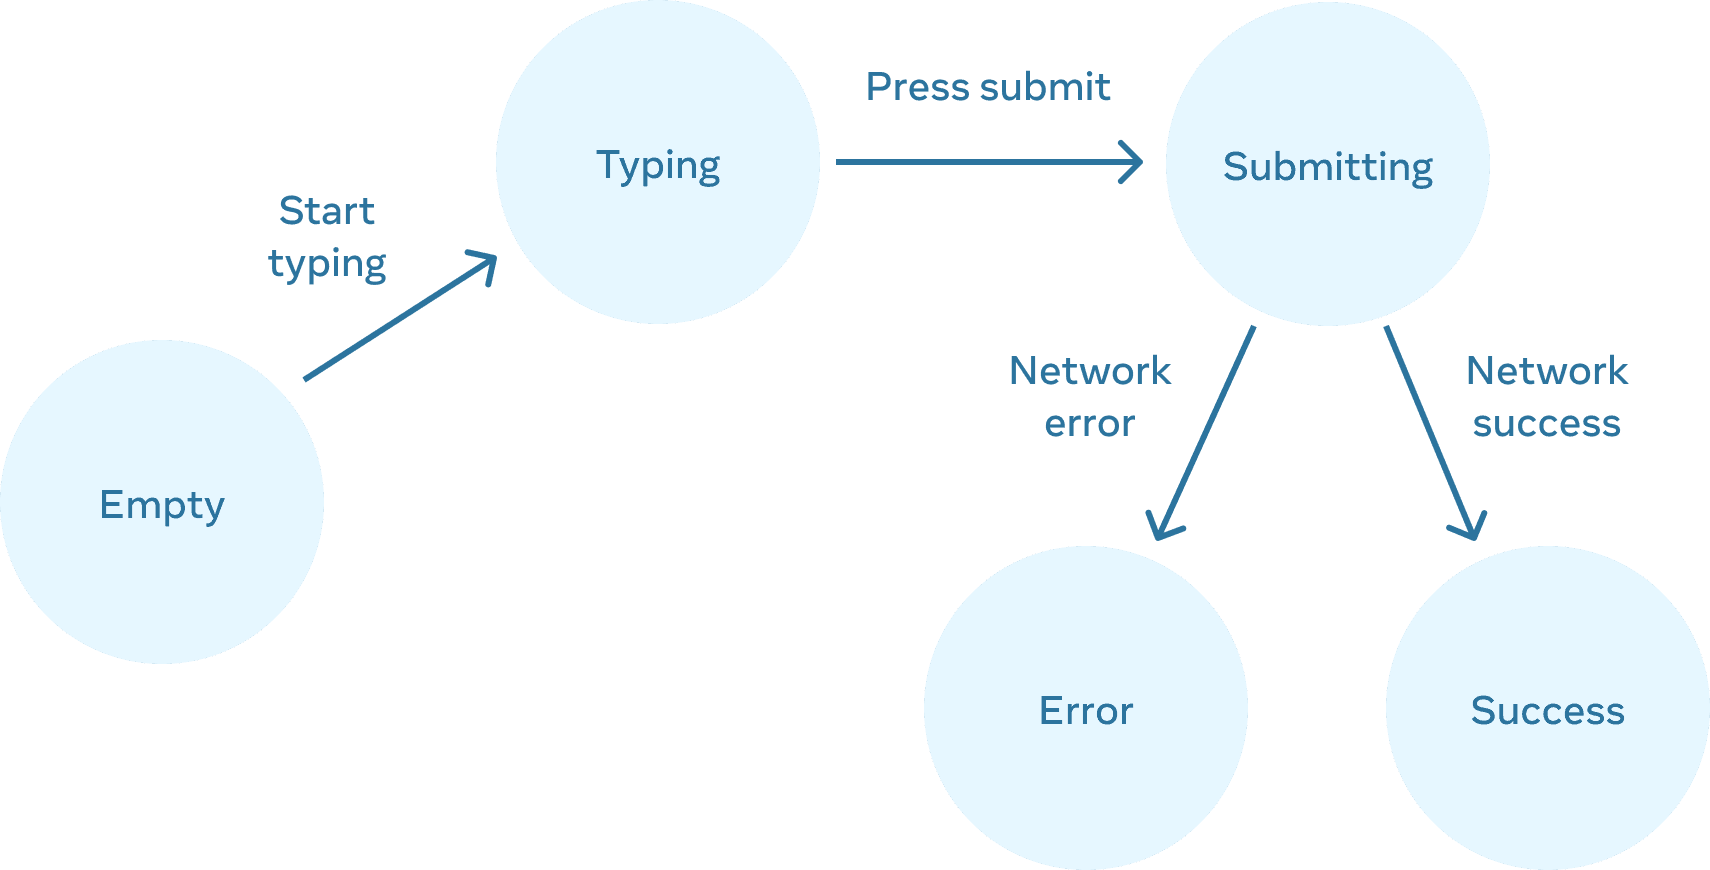
Form states
Step 3: Represent the state in memory with useState
Next you’ll need to represent the visual states of your component in memory with useState. Simplicity is key: each piece of state is a “moving piece”, and you want as few “moving pieces” as possible. More complexity leads to more bugs!
Start with the state that absolutely must be there. For example, you’ll need to store the answer for the input, and the error (if it exists) to store the last error:
const [answer, setAnswer] = useState('');
const [error, setError] = useState(null);
Then, you’ll need a state variable representing which one of the visual states that you want to display. There’s usually more than a single way to represent that in memory, so you’ll need to experiment with it.
If you struggle to think of the best way immediately, start by adding enough state that you’re definitely sure that all the possible visual states are covered:
const [isEmpty, setIsEmpty] = useState(true);
const [isTyping, setIsTyping] = useState(false);
const [isSubmitting, setIsSubmitting] = useState(false);
const [isSuccess, setIsSuccess] = useState(false);
const [isError, setIsError] = useState(false);
Your first idea likely won’t be the best, but that’s ok—refactoring state is a part of the process!
Step 4: Remove any non-essential state variables
You want to avoid duplication in the state content so you’re only tracking what is essential. Spending a little time on refactoring your state structure will make your components easier to understand, reduce duplication, and avoid unintended meanings. Your goal is to prevent the cases where the state in memory doesn’t represent any valid UI that you’d want a user to see. (For example, you never want to show an error message and disable the input at the same time, or the user won’t be able to correct the error!)
Here are some questions you can ask about your state variables:
- Does this state cause a paradox? For example,
isTypingandisSubmittingcan’t both betrue. A paradox usually means that the state is not constrained enough. There are four possible combinations of two booleans, but only three correspond to valid states. To remove the “impossible” state, you can combine these into astatusthat must be one of three values:'typing','submitting', or'success'. - Is the same information available in another state variable already? Another paradox:
isEmptyandisTypingcan’t betrueat the same time. By making them separate state variables, you risk them going out of sync and causing bugs. Fortunately, you can removeisEmptyand instead checkanswer.length === 0. - Can you get the same information from the inverse of another state variable?
isErroris not needed because you can checkerror !== nullinstead.
After this clean-up, you’re left with 3 (down from 7!) essential state variables:
const [answer, setAnswer] = useState('');
const [error, setError] = useState(null);
const [status, setStatus] = useState('typing'); // 'typing', 'submitting', or 'success'
You know they are essential, because you can’t remove any of them without breaking the functionality.
Deep Dive
These three variables are a good enough representation of this form’s state. However, there are still some intermediate states that don’t fully make sense. For example, a non-null error doesn’t make sense when status is 'success'. To model the state more precisely, you can extract it into a reducer. Reducers let you unify multiple state variables into a single object and consolidate all the related logic!
Step 5: Connect the event handlers to set state
Lastly, create event handlers that update the state. Below is the final form, with all event handlers wired up:
import { useState } from 'react';

export default function Form() {
  const [answer, setAnswer] = useState('');
  const [error, setError] = useState(null);
  const [status, setStatus] = useState('typing');

  if (status === 'success') {
    return <h1>That's right!</h1>
  }

  async function handleSubmit(e) {
    e.preventDefault();
    setStatus('submitting');
    try {
      await submitForm(answer);
      setStatus('success');
    } catch (err) {
      setStatus('typing');
      setError(err);
    }
  }

  function handleTextareaChange(e) {
    setAnswer(e.target.value);
  }

  return (
    <>
      <h2>City quiz</h2>
      <p>
        In which city is there a billboard that turns air into drinkable water?
      </p>
      <form onSubmit={handleSubmit}>
        <textarea
          value={answer}
          onChange={handleTextareaChange}
          disabled={status === 'submitting'}
        />
        <br />
        <button disabled={
          answer.length === 0 ||
          status === 'submitting'
        }>
          Submit
        </button>
        {error !== null &&
          <p className="Error">
            {error.message}
          </p>
        }
      </form>
    </>
  );
}

function submitForm(answer) {
  // Pretend it's hitting the network.
  return new Promise((resolve, reject) => {
    setTimeout(() => {
      let shouldError = answer.toLowerCase() !== 'lima'
      if (shouldError) {
        reject(new Error('Good guess but a wrong answer. Try again!'));
      } else {
        resolve();
      }
    }, 1500);
  });
}
Although this code is longer than the original imperative example, it is much less fragile. Expressing all interactions as state changes lets you later introduce new visual states without breaking existing ones. It also lets you change what should be displayed in each state without changing the logic of the interaction itself.
Recap
- Declarative programming means describing the UI for each visual state rather than micromanaging the UI (imperative).
- When developing a component:
- Identify all its visual states.
- Determine the human and computer triggers for state changes.
- Model the state with
useState. - Remove non-essential state to avoid bugs and paradoxes.
- Connect the event handlers to set state.
Challenge 1 of 3: Add and remove a CSS class
Make it so that clicking on the picture removes the background--active CSS class from the outer <div>, but adds the picture--active class to the <img>. Clicking the background again should restore the original CSS classes.
Visually, you should expect that clicking on the picture removes the purple background and highlights the picture border. Clicking outside the picture highlights the background, but removes the picture border highlight.
export default function Picture() {
  return (
    <div className="background background--active">
      <img
        className="picture"
        alt="Rainbow houses in Kampung Pelangi, Indonesia"
        src="https://react.dev/images/docs/scientists/5qwVYb1.jpeg"
      />
    </div>
  );
}